The Production Process of Delftware According to Paape
In 1794, Gerrit Paape wrote the treatise De Plateelbakker of Delftsch Aardewerkmaaker (‘The Faience Potter or Maker of Delftware’), in which he outlined many aspects of the eighteenth-century process of producing Delftware. This invaluable resource offers a step-by-step explanation of production, from the kinds of soil and all the workmen and their functions, to the filling of the kiln and even the recipes for the paints. Paape’s text underscores the incredible feat potters accomplished to create Delftware, from soil to a fired object. It also showed how many people must have been involved, and the organization of the factories required to succeed.
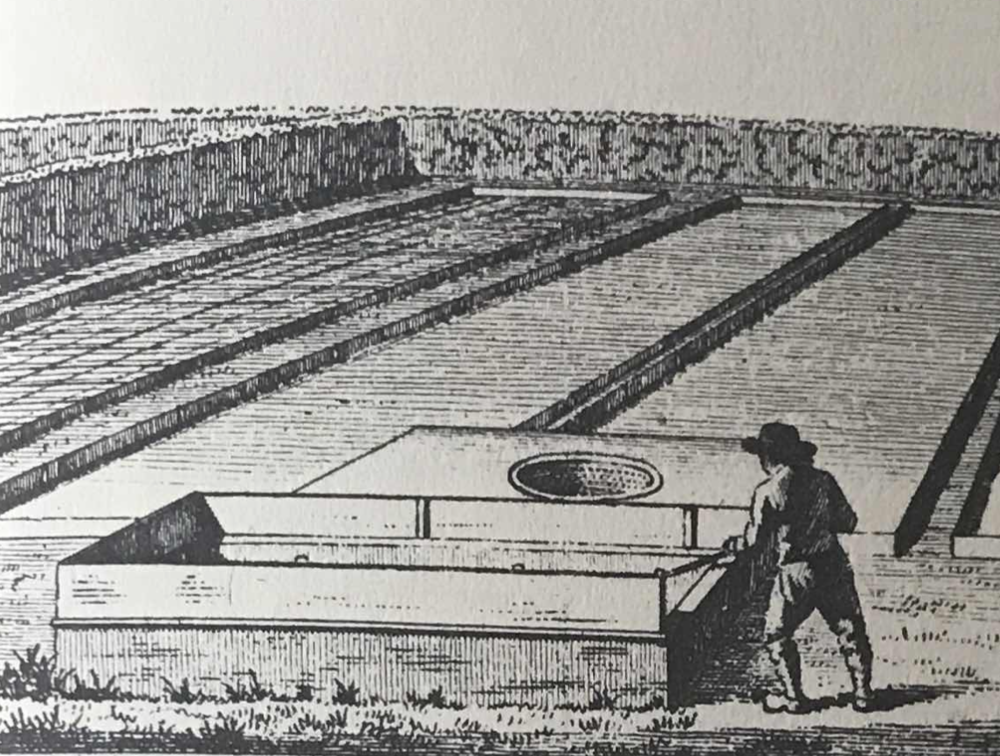
Many different types of soil were used for the manufacture of Delftware, such as Tournai, Rhine or Black and Delfts soil. The soils, which are cut and dug in different places, differ from each other in their sparseness and fatness. Before the soil could be used, it was purified in a ‘aardewasserij’ (the place where the soil gets ‘washed’). These so-called ‘aardewasserijen’ were large open places with housing for a workman. They were mostly located in the city of Delft, proportional to the number of Delftware factories. There were only a few outside of Delft.
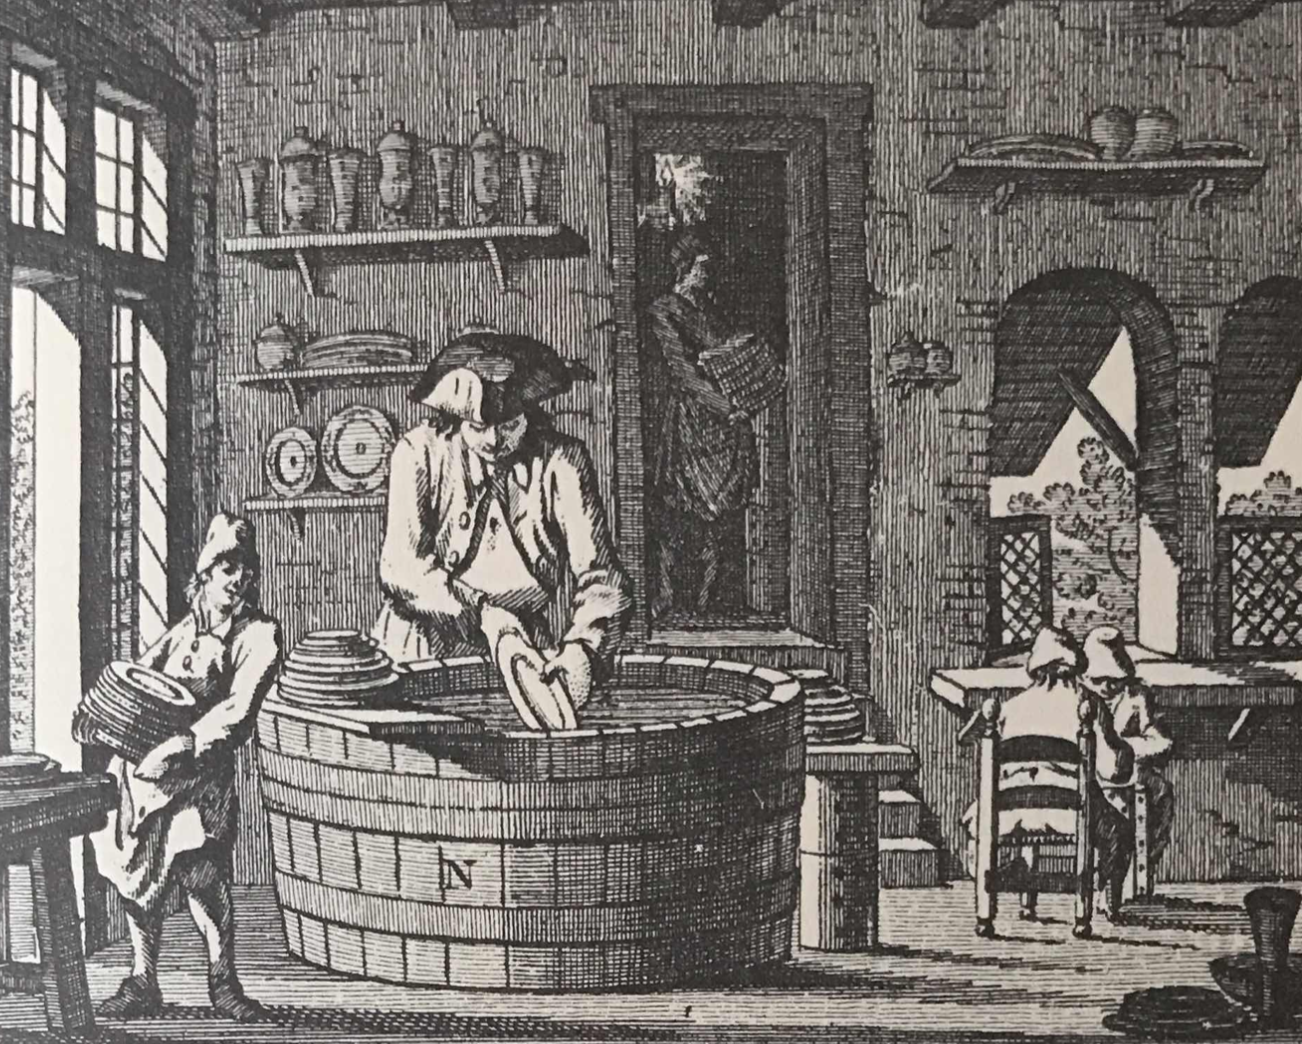
Using wheelbarrows, the dry soil was transported in different combinations, such as six loads of Tournai soil, three of Rhine and two of Delft soil. The soil was then placed in a large tub or container near the water so it could easily be filled with water.1 It was left under water until it was soaked and decomposed enough, after which it was carefully stirred with a heavy shovel or spade. With a copper sieve, the mixture was transferred to another container.2 Through a gutter, the washed soil was drained into another container of which the bottom was covered with sand to prevent the mixture from adhering to it. The water was then diverted and the container closed so that the soil could dry and stiffen. After this process, the soil was cut into square pieces and placed on its side for further drying. Then, the pieces of washed soil were transported by boat to the Delftware factories.3
When the washed clay arrived at the factory, it was stored in masonry pits and watered from time to time. The workman, the so-called ‘aardetrapper’ (soil stomper), would extract some of the clay from the wells and would throw it on a wooden ground sprinkled with sand. With bare feet, he would stand on the heap of clay and stomp it into a large round form. Then the clay was cut and kneaded into large square pieces and brought to the potting wheel.4
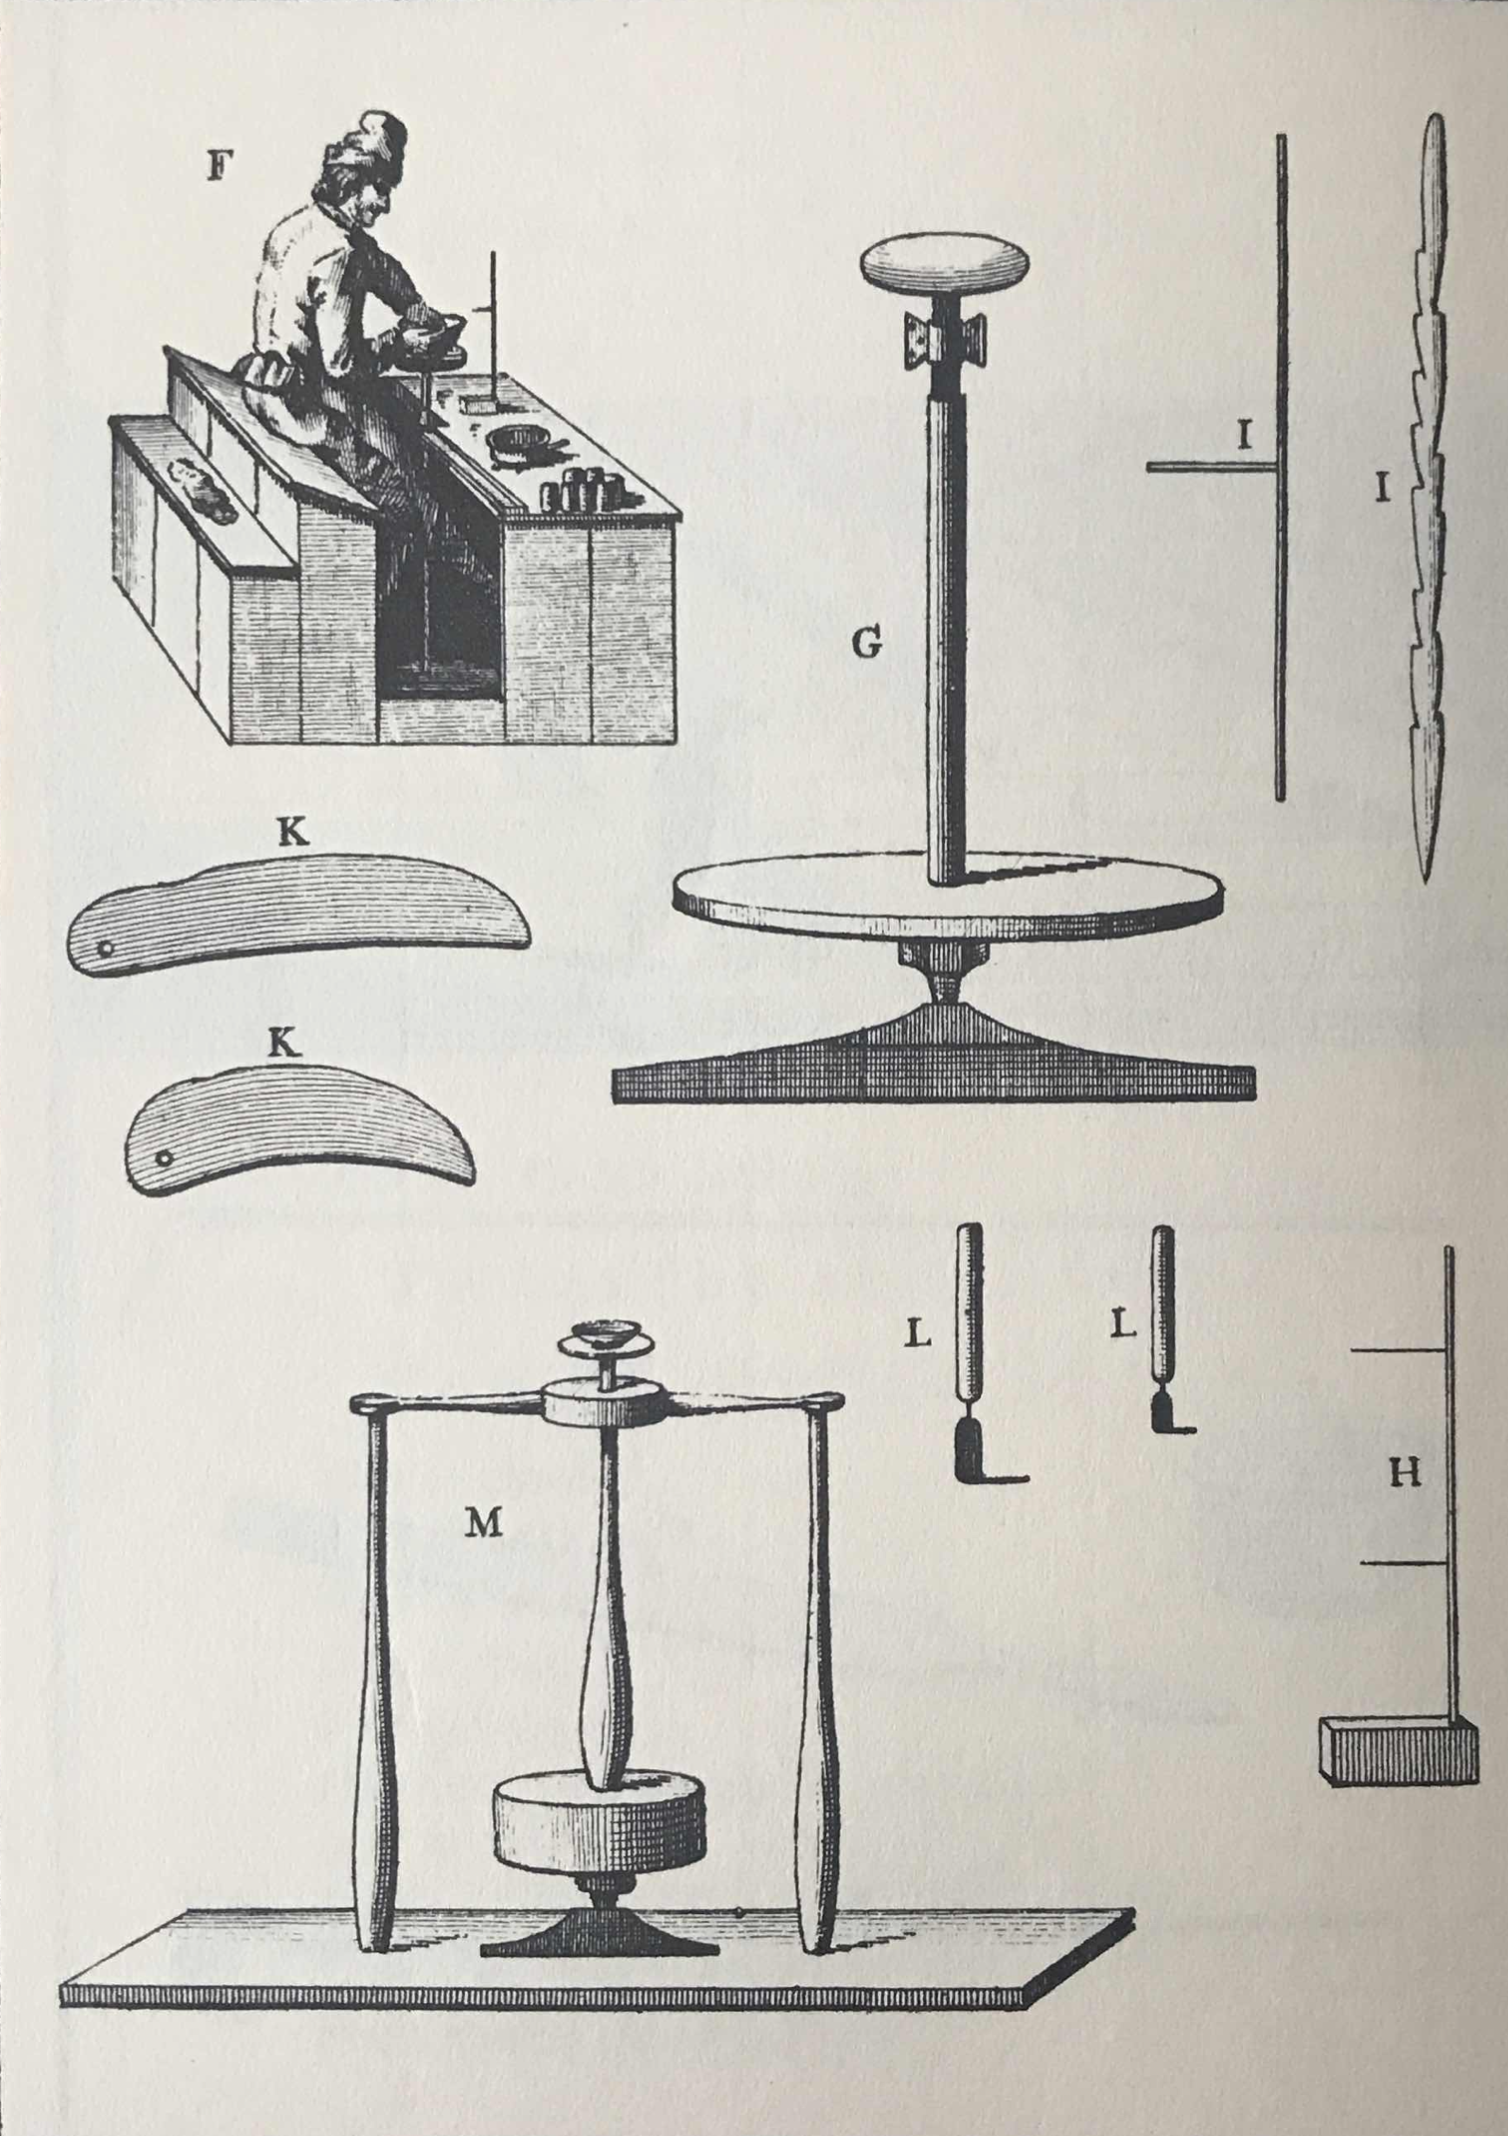
The workmen at the potting wheel would divide the clods into smaller pieces and knead the clay.5 Then, he would put a chunk of clay on the throwing wheel and spin it in his hands, manipulating the shape with his fingers. Using a thin copper wire, the object was cut from the wheel and placed on a so-called ‘draaibord’ (turntable).6 Once the turntable was full, the potter brought it to the attic to quickly dry the objects and to protect them against frost in the winter (the attics were hot because of their proximity to the kilns). When the objects were dried to a certain degree of firmness, they were brought back to the throwing wheel to smooth the surface.7
Vessels that are not round or are composed of multiple pieces cannot be thrown on a wheel. Instead, they were formed by artists called ‘vormers’ (shapers/formers). First, the vormer would sculpt a piece of clay into a figure. When the completed figure was dry, he created a dam of clay around the piece.8 The space between the figure and the dam would determine the thickness of the shape. Then, plaster was mixed with water by hand and poured between the figure and the dam, coating all the cavities of the sculpted piece. Once the plaster was set, the ‘vormer’ removed the dam and the mold was turned over to take the object out to let the mold dry for further use. Next, the ‘vormer’ rolled a piece of kneaded clay over the mold, using a humid sponge to work the clay into all the cavities. After the object was removed from the mold, its surface was smoothed.9 Small pieces, such as ears, handles, and legs, are made separately either by hand or in molds and attached to the objects with a very greasy clay. Like the thrown objects, formed pieces were also placed in the attic to dry.10 After this, these so-called ‘raw’ goods, received their first firing in the kiln.
The next step of the process was initiated by another workman, called a ‘vloerwerker’ (floor worker). Their work was largely done on the floor in front of the kiln, from the preparation, the filling of the kiln and the firing. After the objects came out of the oven, any remaining dust or sand were cleaned with a long soft-haired brush.11 Then, the objects were immersed in a large tub filled with a liquid composition called ‘Wit’ (this was a white tin glaze), to compensate for the yellow color of the earthenware after the first firing. This was done quickly by the ‘gever’ (giver), because dry earthenware absorbs any moisture.12 Once the giver dipped the piece in, he held it straight on its side to drain the excess white and placed the object on a shelf fitted with half-hammered nails.13 After the shelf was full, and the pieces dried for a few moments, the ‘afnemer’ (taker) would place the objects on the draaibord and bring them to the attic to dry.14
Once the objects were dried, the Delftware painter would decorate them. Painting Delftware was difficult, since the painter could not let the brush rest on the piece, because the earthenware would soak up all the paint. The brushes were usually handmade by the painter, using hair from the ears of a cow, and were long and of medium firmness, so that they could hold enough paint.15 The painter often used stencils to complete the design. For this process, a stencil would be placed and then dusted with charcoal, which would leave a dotted outline for the painter to follow and complete the lines with his brush.16

After the object was painted, it was passed off to the vloerwerker who applied a colorless layer of gloss on top of the glaze using a short-haired brush. This layer, which was called kwaart (a corruption of the Italian word coperta) not only made the objects shiny, but it also added a layer of protection. Next, the object was placed in a saggar.17 After the saggars were filled, they were placed in the kiln.18
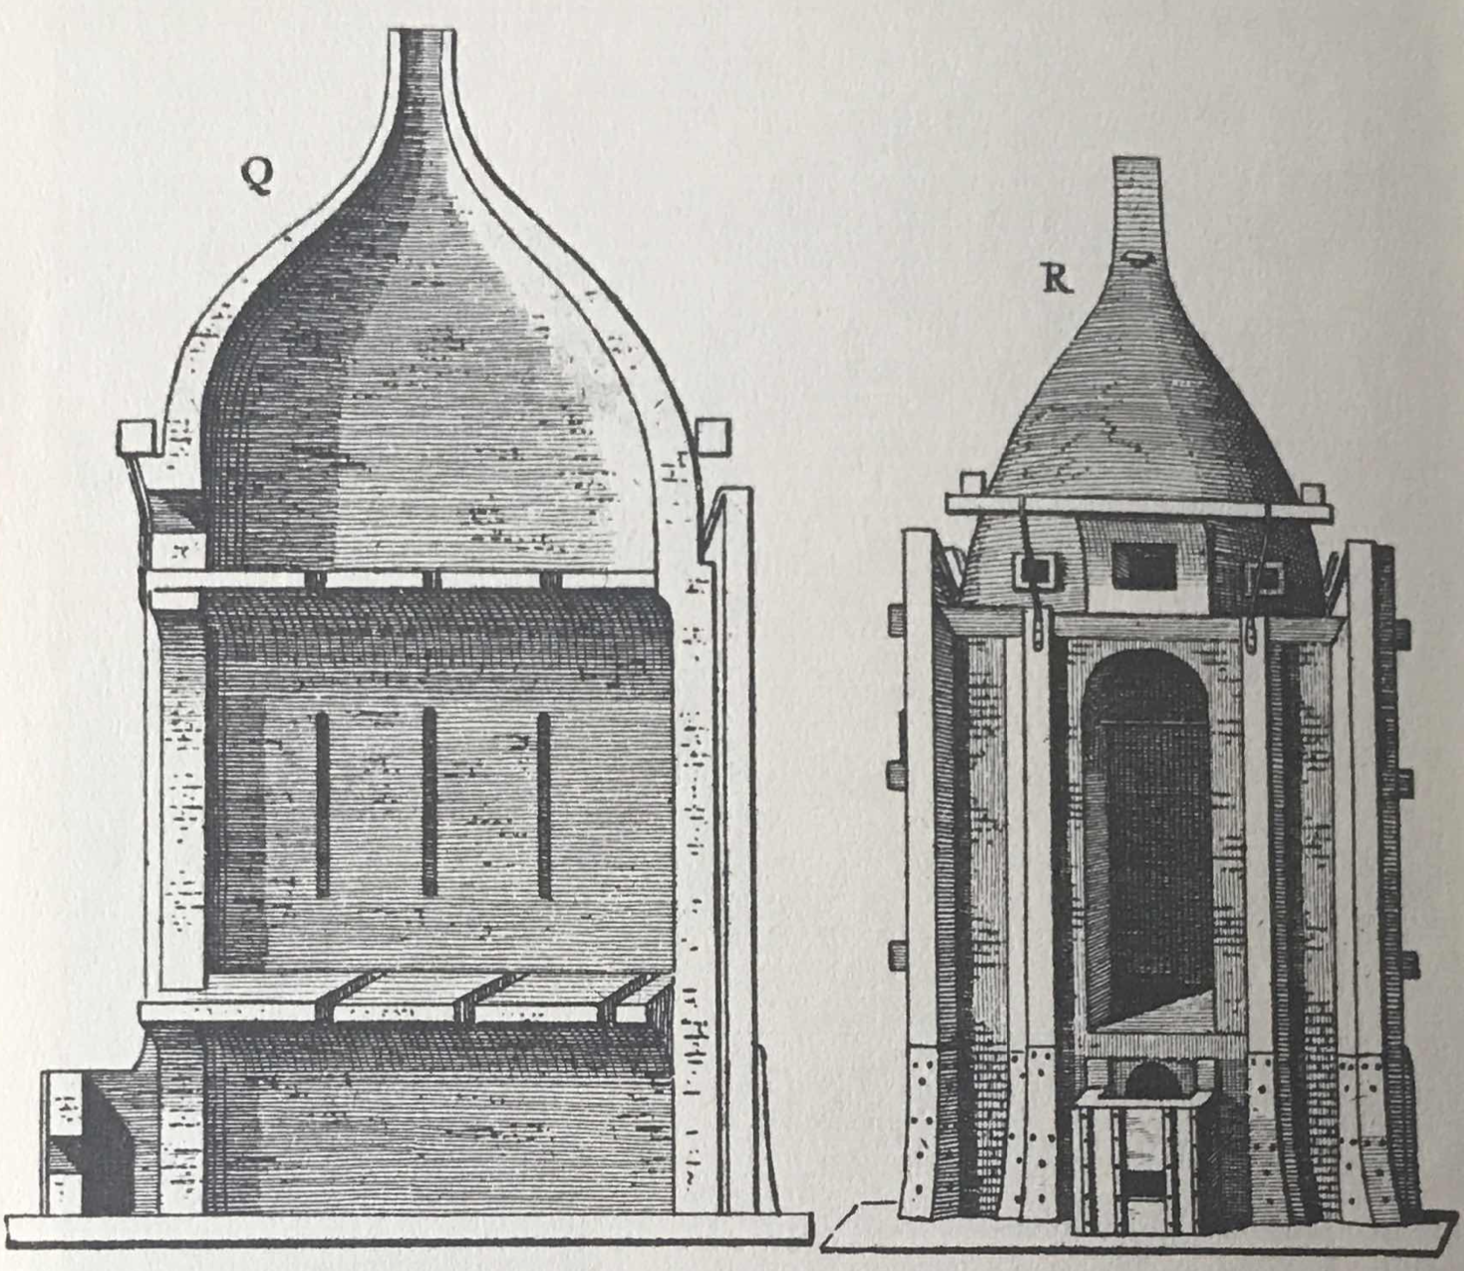
The kiln was a square building composed of heavy walls with a heating hole at the front, from where the wood was brought under the kiln. The firing section in the center was approximately 90 to 120 cm. (35.4 to 47.2 in.) high. The interior of the kiln was divided into three sections, which were accessible through an opening or gate.19 The kilns were filled by the highest rank floor workers, called the ‘stokers’. First, unfired saggars were placed against the side walls of the back. A stack of earthenware plates, called a ‘kap’ (hood) was placed in each saggar. The top and bottom plates of this stack were already fired to prevent the stack from warping. A tile was placed on each filled saggar and a stack of already fired plates was placed on top of this tile, over which another saggar was placed and then covered with a tile again. It was stacked to about 9, 10 or 11 saggars high.20
Stones or previously fired saggars that were filled with Delftware were placed against the entire width of the back wall of the kiln and stacked about nine to eleven saggars high. The space between the saggars was kept as small as possible and was filled with soil, so that the columns of saggars would not fall against each other. Earthenware that was able to bear the highest fire was placed in the bottom layers, while earthenware that could not withstand high temperatures was placed as high as possible.21 Even if eleven saggars were placed on top of each other, there was still some space left at the top that could accommodate earthenware receiving its first rough firing. Tiles were laid on top of the saggars to create a floor on which the ‘rough’ objects were placed.22
When the oven was filled, the door or the opening of the inner part was closed with a wall of dry masonry stones placed on top of each other. The door, which had some necessary holes, was then plastered on the outside with a clay that consisted of pieces of broken unfired earthenware which were soaked and mixed with sand. After the whole door was plastered, a wet brush was used to make it even and secure against cracking or tearing. If any cracks appeared during firing, they were immediately filled with clay.23 After the door was securely closed, the wood could be burned.
A small fire was started first, and further kindled after a couple of hours in order to have a moderate and equal heat. When the smoldering stopped, the so-called ‘kleinvuurstoker’ (small fire burner) would place an iron opening in the heating hole on which he placed tiles to close the opening to prevent drafts from entering the kiln.24 The opening also allowed men to throw wood in the kiln.25 The ‘kleinvuurstoker’ completed this task from 5 am to 9 pm, when the ‘grootvuurstoker’ (large fire burner) replaced him. The fire burners would also sit by the kiln and occasionally remove a tile to throw wood into the kiln and reseal the hole with another tile.26
An hour before the anticipated completion, a sample was taken out of the kiln from a small hole in the top part of the door by pulling off a large stone.27 Another sample was taken from a similar hole in the side wall at the back of the kiln, in order to see whether each area of the kiln reached the required temperature. Once the samples were removed, the holes were filled with their stones and sealed with clay.28 If the earthenware was properly fired, usually after twenty-eight to thirty hours, the firing stopped. The doors and windows were closed to prevent a draft entering the kiln, which could burst the earthenware inside. Further, it was important to avoid anything burning underneath the kiln after firing, because even a small amount of smoke would turn the earthenware black.29
After the kiln cooled down for a day or two, the top part of the door was broken down. On the third day, the rest of the door was broken and the Delftware was removed from the kiln. The painted wares were then detached from the pins and brought to the attic or the warehouses. The raw fired objects, which received their first firing, were then painted as described above and placed back in the kiln.30
The above shows that Paapes’ De Plateelbakker of Delftsch Aardewerkmaaker provides a comprehensive resource for the production of Delftware. However, the treatise is not always entirely clear. Names are usually explained, but some are still a mystery. The meaning of some words that do not exist anymore in the Dutch language, has been lost over time. Further, Paape describes in detail the grand feu technique, but he does not mention the petit feu technique. Perhaps he left out this technique because it was rarely used in the last thirty years of the eighteenth century. Nevertheless, it is a truly invaluable source of information regarding the eighteenth-century Delftware production process.
1 G. Paape, De Plateelbakker of Delftsch Aardewerkmaaker, 1794, p. 5
2 Paape 1794 (note 1), p. 6
3 Paape 1794 (note 1), p. 7
4 Paape 1794 (note 1), p. 9
5 Paape 1794 (note 1), p. 10
6 Paape 1794 (note 1), p. 11
7 Paape 1794 (note 1), p. 12
8 Paape 1794 (note 1), p. 15
9 Paape 1794 (note 1), p. 16
10 Paape 1794 (note 1), p. 17
11 Paape 1794 (note 1), p. 18
12 Paape 1794 (note 1), p. 19
13 Paape 1794 (note 1), p. 20
14 Paape 1794 (note 1), p. 21
15 Paape 1794 (note 1), p. 23
16 Paape 1794 (note 1), pp. 24-28
17 Paape 1794 (note 1), p. 31
18 Paape 1794 (note 1), p. 39
19 Paape 1794 (note 1), pp. 40-41
20 Paape 1794 (note 1), p. 42
21 Paape 1794 (note 1), p. 43
22 Paape 1794 (note 1), p. 44
23 Paape 1794 (note 1), p. 45
24 Paape 1794 (note 1), p. 46
25 Paape 1794 (note 1), p. 47
26 Paape 1794 (note 1), p. 48
27 Paape 1794 (note 1), p. 49
28 Paape 1794 (note 1), p. 50
29 Paape 1794 (note 1), p. 51
30 Paape 1794 (note 1), p. 52